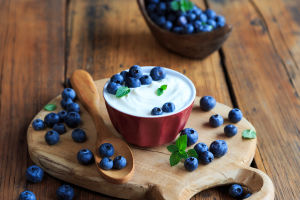
On a warm day, we often look for something cool, fruity, and creamy to enjoy at home. Today, we are making a blueberry ice cream that feels smooth, rich, and full of natural fruit flavor.
What makes this dessert special is its simple method. We do not need any machine or complicated tools. By carefully preparing each step, we can create a soft and creamy texture with real fruit pieces in every bite.
Let’s go step by step so we can enjoy both the process and the final result.
What We Are Making
We are preparing a homemade blueberry ice cream made from fresh fruit, milk, egg yolks, and whipped cream.
The final dessert has:
- A soft creamy base
- A naturally sweet blueberry flavor
- Light fruity chunks inside
- A smooth texture that melts gently in the mouth
It feels refreshing and balanced, not overly heavy, and perfect for warm days when we want something chilled and comforting.
Full Ingredients List with Quantities
To make this blueberry ice cream, we prepare three parts: blueberry sauce, milk-egg base, and cream mixture.
Blueberry sauce:
- Fresh blueberries: 175 g
- Fine sugar: 40 g
Milk-egg base:
- Egg yolks: 4
- Fine sugar: 60 g
- Milk: 100 g
- Salt: a very small pinch (about 1/8 teaspoon)
Cream base:
- Whipping cream: 380 g (keep chilled before use)
These simple ingredients work together to create a creamy and fruity frozen dessert.
Step 1: Making the Blueberry Sauce
1. We begin with fresh blueberries. We place them into a small saucepan and sprinkle 40 g of sugar evenly over them.
2. Next, we gently stir so the sugar coats every berry. Then we heat the mixture over low warmth.
3. As it warms, the blueberries slowly release juice. We keep stirring gently so the fruit softens evenly. The mixture becomes glossy and juicy.
4. When it starts bubbling, we continue cooking until it thickens. The liquid reduces, and the texture becomes like a soft fruit sauce.
5. Once it reaches a jam-like consistency, we remove it from heat. We let it cool completely, then place it into the refrigerator so it becomes cold and slightly thickened.
Step 2: Preparing the Milk and Egg Base
Now we move to the creamy base.
1. We pour 100 g of milk into a small saucepan and add 60 g of sugar and a small pinch of salt. We heat it gently while stirring until the sugar fully dissolves.
2. When the milk begins to gently rise with small bubbles at the edge, we turn off the heat.
3. In a separate bowl, we place 4 egg yolks. We whisk them until smooth and slightly thick.
4. Next, we slowly pour the warm milk into the egg yolks while whisking continuously. We do this gradually so the eggs blend smoothly without forming lumps.
5. After mixing, we return the liquid back into the saucepan through a fine strainer. This helps make the texture smoother.
6. We heat it again over low warmth while stirring constantly. Slowly, the mixture thickens and begins to coat the back of a spoon.
7. When it becomes slightly thick and smooth, we immediately remove it from heat. We place the saucepan into a bowl of cold water to stop further heating. Once cooled, we refrigerate it until fully chilled.
Step 3: Whipping the Cream
1. We take 380 g of cold whipping cream and place it into a mixing bowl.
2. Using a mixer, we whip it until soft peaks form. This means the cream becomes thick but still soft enough to flow gently when lifted.
3. We avoid over-whipping so the texture stays light and smooth.
Step 4: Combining Everything
1. Now we bring everything together.
2. We take the chilled milk-egg base and mix it with the blueberry sauce. We stir slowly until the color becomes a soft purple shade and the mixture is evenly combined.
3. Next, we gently fold this mixture into the whipped cream. We use slow, light movements so the air stays inside the cream.
4. At this point, the mixture becomes smooth, fluffy, and ready for freezing.
Step 5: Freezing and Serving
1. We pour the final mixture into a clean container. We smooth the surface and cover it.
2. Then we place it into the freezer until it becomes firm.
3. When ready to serve, we let it sit for a few minutes at room temperature so it softens slightly. This makes it easier to scoop.
4. We can serve it in bowls or small cups, enjoying the creamy texture and fruity blueberry flavor in every bite.
Final Thoughts
Lykkers, this blueberry ice cream is a simple homemade dessert that brings together fruit freshness and creamy comfort. Each step is easy to follow, and the result is rewarding every time.
We can also try different fruits in the same method to create new flavors and enjoy variety at home.
What fruit would we try next for our own version of this creamy treat?
How to Make Blueberry Ice Cream Without an Ice Cream Machine
Video by The Cooking Foodie