Have you ever wondered how those golden drops of peanut oil end up in our kitchens? Today, we’re diving into the step-by-step journey of turning peanuts into delicious, clean cooking oil.
It’s a fascinating process full of science, care, and precision—definitely not just squeezing some nuts! Let’s walk through the process together, and you’ll never look at a bottle of peanut oil the same way again.
Step 1: Getting the Right Peanuts
We begin with raw peanuts, and choosing the right variety is key. There are different types like raw-edible peanuts, regular ones, and high-oleic peanuts, which are packed with nutrients and have a higher oil content. For oil-making, high-oleic peanuts are the go-to. We also need to make sure the peanuts are fresh, clean, and mold-free. That’s the first step toward making high-quality oil.
Step 2: Pre-Treatment – Cleaning and Cracking
Before pressing, peanuts need a makeover. This stage includes several steps:
1. Shelling: Peanuts are first stripped of their shells. The shell doesn’t contain oil and actually absorbs it, so removing it helps us get more oil out and protects the machines from wear and tear.
2. Cleaning: Next, machines like vibrating screens and magnetic separators remove dust, small stones, and metal scraps. Clean peanuts make better oil!
3. Crushing: Whole peanuts are too big and heat unevenly. So, we crush them into evenly sized pieces to ensure uniform cooking later.
4. Rolling into flakes: These crushed peanuts go through rollers to become thin flakes. This increases their surface area and makes it easier to squeeze the oil out.
5. Steaming and roasting: Finally, the flakes are cooked at 130–150°C. This step controls moisture, enhances flavor, and prepares the peanuts for pressing.
Step 3: The Oil Pressing Process
Now it’s time to press! We put the prepared peanut flakes into an oil press machine. Through powerful squeezing and grinding, the oil begins to flow out. This is a purely physical method—no chemicals involved. Sometimes, if the first press doesn’t get all the oil, we press the leftovers again to make sure nothing goes to waste.
Step 4: Refining – Turning Crude Oil into Golden Liquid
The freshly squeezed oil still contains impurities and needs refining before it can be bottled and sold. Here's how we refine it:
1. Filtering: The crude oil has solid residues. We use filters to remove these particles and clean up the liquid.
2. Degumming: By adding a safe, food-grade acid like phosphoric acid, we remove sticky gum-like substances from the oil.
3. Deacidifying: Peanuts naturally have some free fatty acids, which can affect the taste. We add sodium hydroxide (NaOH) to neutralize these acids.
4. Decolorizing: Due to the heat during roasting, the oil might look darker. We use natural decolorizers like activated clay to lighten the color and make it clearer.
5. Deodorizing: This final step removes any strange smells caused by heating. Using high temperatures under vacuum, we evaporate those small odor molecules, leaving the oil with a clean aroma.
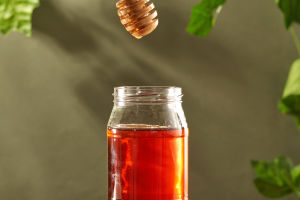
What We Get in the End
After all these careful steps, what we finally get is beautifully clear, golden peanut oil with a rich and pure flavor. This oil is ideal for cooking and brings both taste and nutrition to our meals. It’s incredible to see how much work and care go into every bottle!
From Farm to Frying Pan
Now that we’ve walked through the full journey, it’s clear that making peanut oil is no simple task. It’s a precise and thoughtful process, from choosing the right peanuts to carefully refining the oil. Next time we cook with peanut oil, we’ll definitely appreciate the effort behind every drop.
Lykkers, have you ever tried making oil at home or seen a press in action? Share your thoughts or questions—we’d love to hear what you think! Let’s keep learning and exploring together.