A gallery wall is more than a place to hang art—it's a personal expression that brings life, warmth, and story to your space. Whether you're displaying family photos, abstract prints, or travel treasures, the key is balance, intention, and a bit of play.
For Lykkers who want to build a gallery wall that feels meaningful and stylish (without the stress), this guide offers a simple and relaxed approach to planning, styling, and hanging your art like a pro.
Part 1: Plan Your Gallery Wall with Purpose
Before you start hammering nails or ordering prints, it's worth taking a little time to map out your vision. This part will help you choose the right pieces, layout, and location to bring harmony and heart into your space.
Pick a wall that wants attention
Look for a spot that could use some personality—above a sofa, along a hallway, or behind a bed. You want a space that can handle visual interest without overwhelming the room. If it feels a little blank now, it's probably the perfect place.
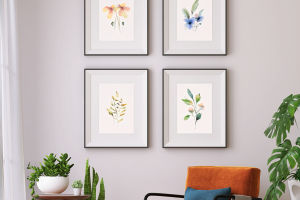
Choose a theme or feeling
Your gallery wall doesn't need to be matchy-matchy, but it helps to have a common thread. That could be a color palette, frame style, subject (like nature or travel), or even just a vibe—think calm and minimal, or bold and expressive.
Mix up the media
Don't be afraid to blend photography, paintings, sketches, or typography. You can even add small objects like woven pieces or mirrors. A mix keeps it interesting and lets your personality shine through.
Lay it out on the floor first
Before hanging anything, place your chosen pieces on the floor and arrange them like a puzzle. This lets you test different layouts, swap out frames, and get a feel for spacing without committing to a single nail in the wall.
Keep the center at eye level
As a general rule, aim for the midpoint of your gallery to sit around 57–60 inches from the floor. This helps it feel balanced and easy to enjoy, especially in common areas where people will walk past and look closely.
Part 2: Style and Hang with Confidence
Now that your vision is clear and your layout is set, it's time to bring your wall to life. This section will help you hang your pieces with ease—and keep the whole wall looking polished, intentional, and full of character.
Start from the center and work out
Begin with your central piece (or the one you want to highlight most) and build around it. This helps keep your layout anchored and gives a clear focal point to guide the rest of the arrangement.
Use consistent spacing between pieces
Try to leave about 2–3 inches between each frame for a cohesive look. Even if your pieces vary in size or shape, keeping the gaps even makes the whole arrangement feel neat and thoughtfully designed.
Match (or deliberately contrast) your frames
If you love a clean and minimalist style, go for frames in the same color or material. Want a more eclectic feel? Mix metals, woods, and styles on purpose. Just be sure to balance the visual weight across the wall so it doesn't feel lopsided.
Hang with removable hooks or paper guides
To avoid a wall full of holes, use removable adhesive hooks or create paper templates to tape up first. Mark each with a pencil where the hook or nail will go. Once you like what you see, swap in the real art—easy and stress-free.
A well-designed gallery wall is like a window into your style—it tells your story without saying a word. Lykkers, remember: the best gallery walls aren't perfect, they're personal. So choose pieces you love, play with your layout, and enjoy the process of making your space a little more you—one frame at a time.